How to deploy a Node.js app with Laravel Forge
Laravel Forge is the go-to service for running, well, Laravel apps, but did you know that you can easily deploy Node.js apps with it as well?
If you're not familiar with it; Laravel Forge is a platform that connects to cloud providers (like DigitalOcean and Linode) that facilitates the deployment and management of servers.
It's obviously tailored for Laravel, but you can also use it to easily deploy PHP apps and even Node.js apps!
For this tutorial, I'll assume that:
- You have a Laravel Forge account
- You have a subscription with a cloud provider (DigitalOcean, Linode or another supported provider) and linked it with Laravel Forge
Creating the server
Let's spin up our server through Laravel Forge. In this case, I'll use DigitalOcean, but it doesn't really matter what you choose. For the server type, you can choose App Server or Web Server. Web servers do not contain a database or cache, but they're perfect for a small Node.js app.

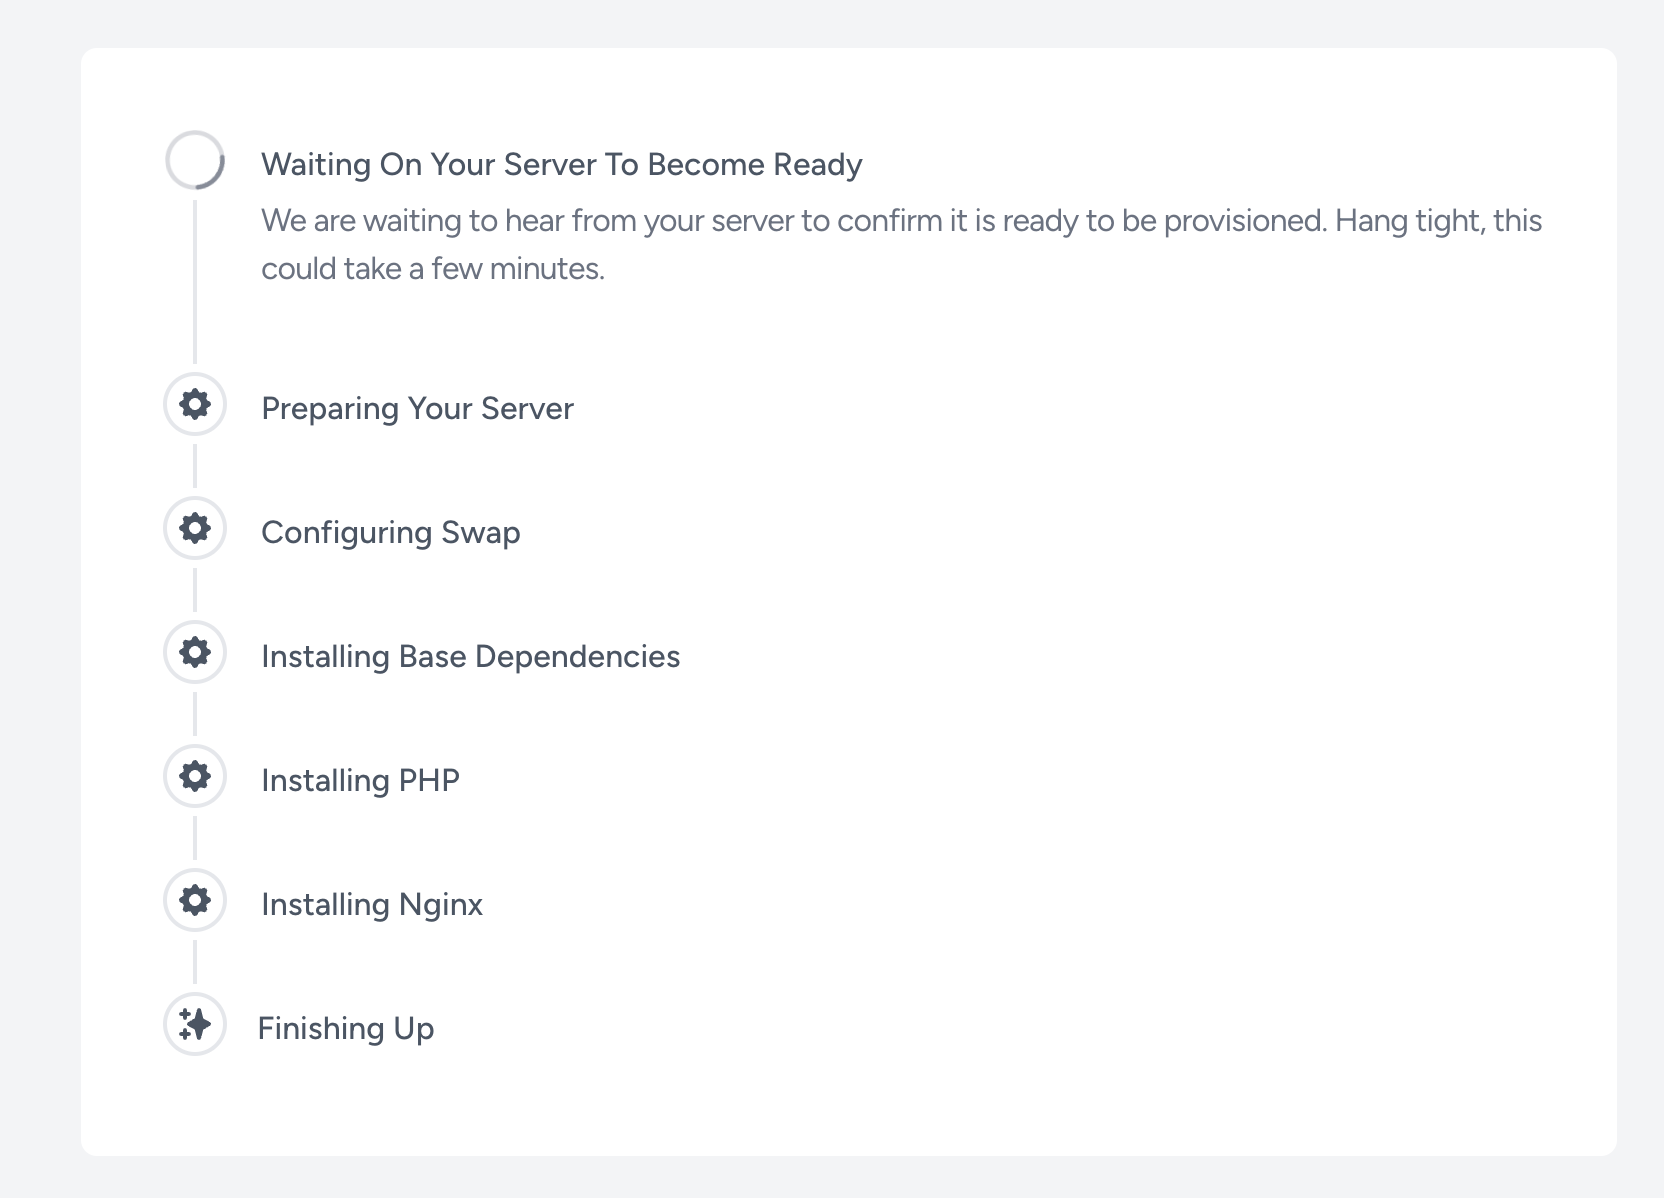
Hang back and wait while Laravel Forge creates and configures your server.
Creating the site
When the server has been configured, we can create a site on the server.
Enter your root domain, and for 'Project Type' choose 'Static HTML / Nuxt.js / Next.js'.
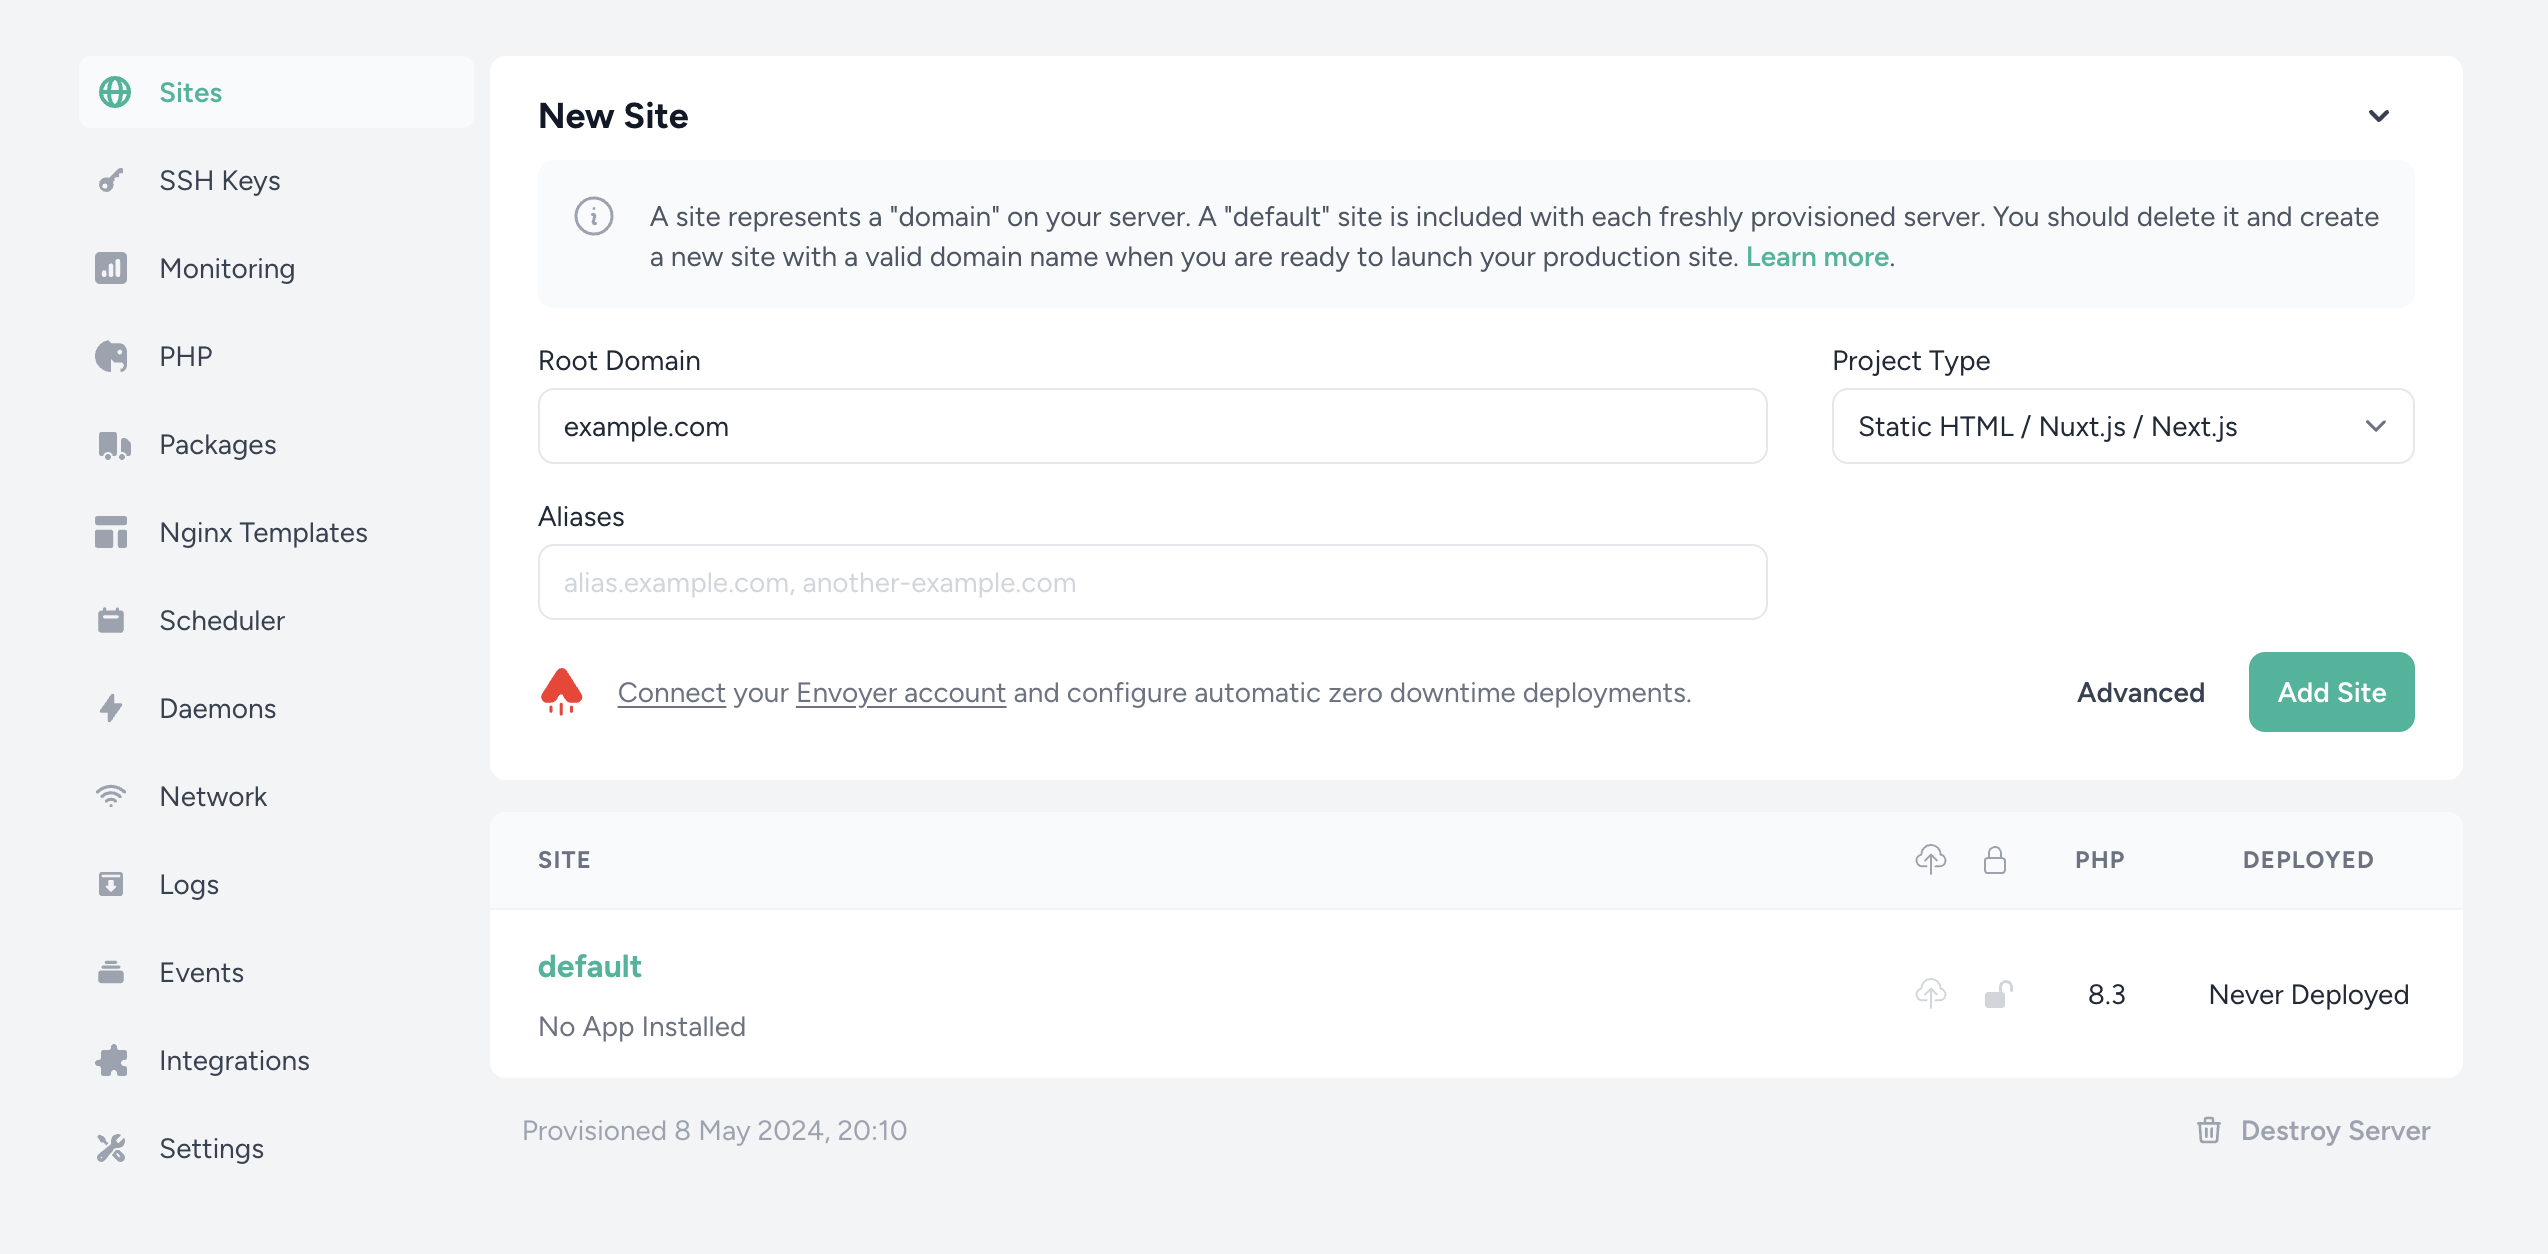
Laravel Forge will now configure the site. In the meantime, you can create an A-record for the domain and point it to the public IP of the server.
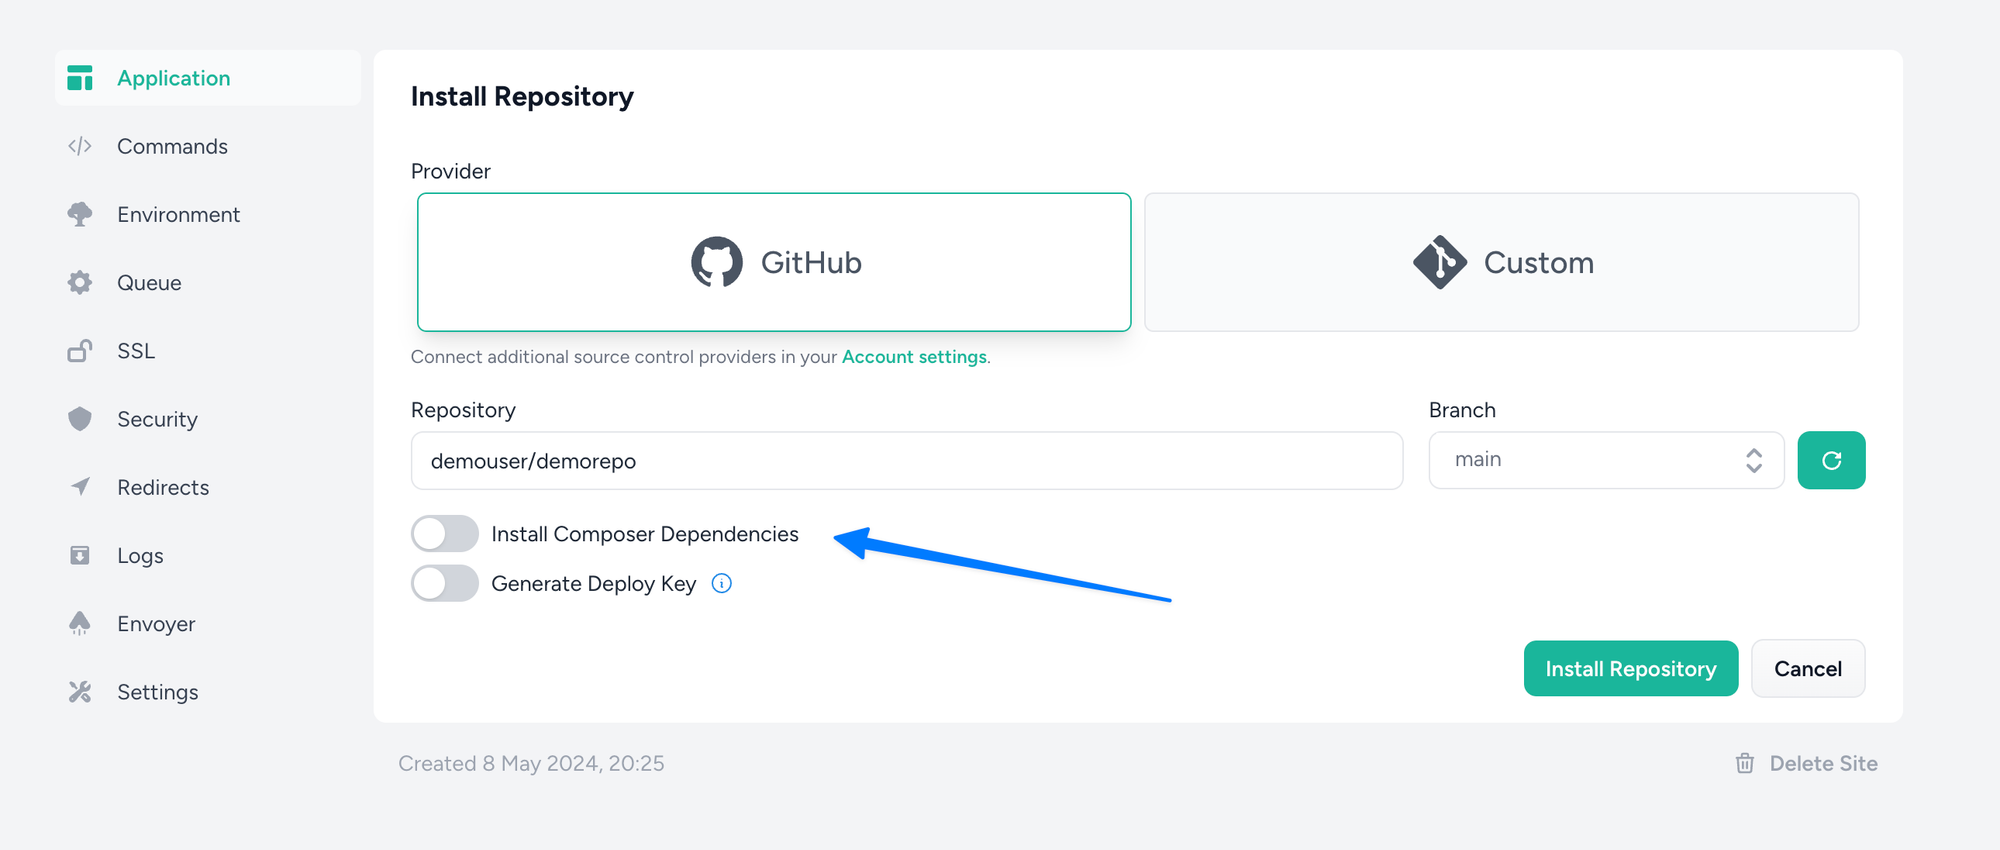
Installing the repository
After the site has been created, we get the option to link the GitHub repository. Enter your repository name (user/repository), choose the branch that you want to deploy and make sure to uncheck the "install composer Dependencies" option!
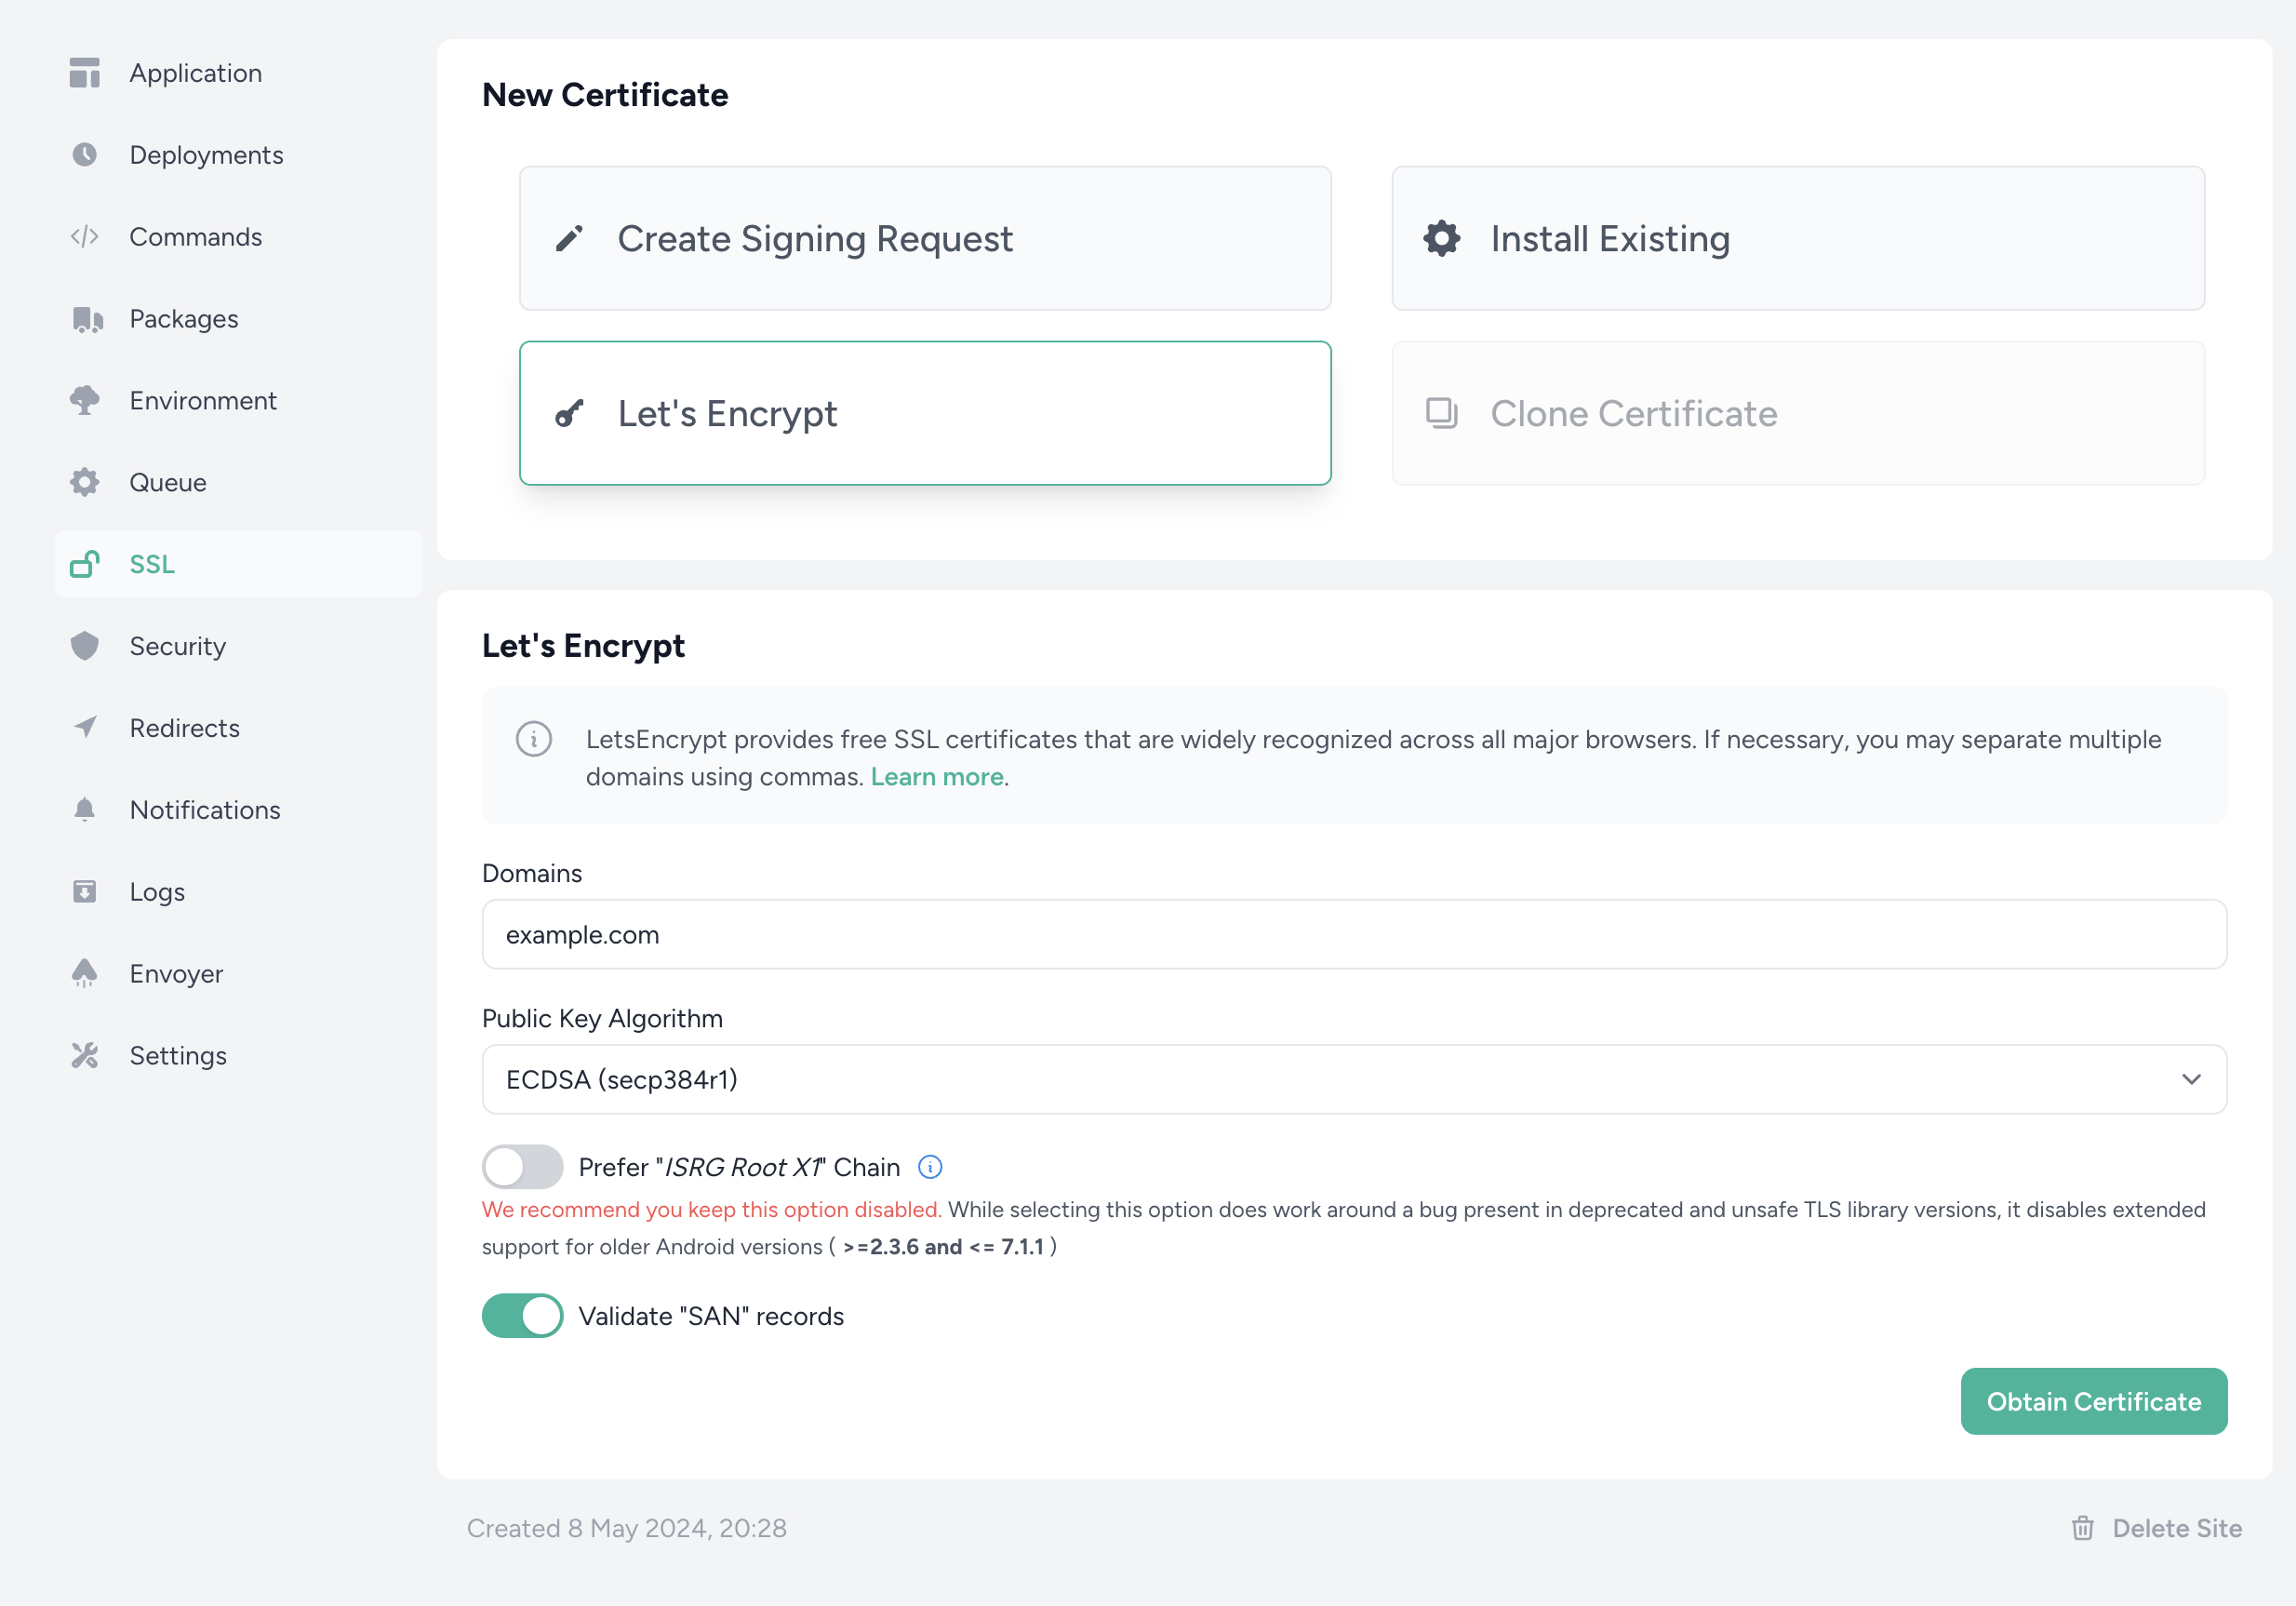
Set up SSL
In your Site settings, go to 'SSL' and create a new Let's Encrypt certificate. You can leave the defaults as-is. After a few minutes, the status of the certificate should be 'Active'.
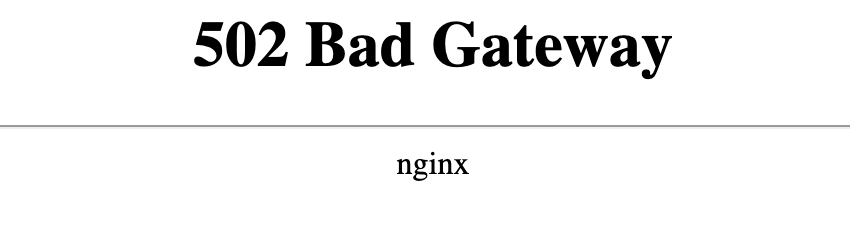
Wait a minute, it doesn't work??
If you visit your site now, you'll be greeted with this lovely message:

This is because it couldn't have been that easy, right. We still need to get our hands a bit dirty and alter the nginx configuration.
Nginx configuration
Currently the Nginx webserver is set up for PHP apps, but we're running a Node.js application that is using port 3000, so we'll have to make that clear to Nginx.
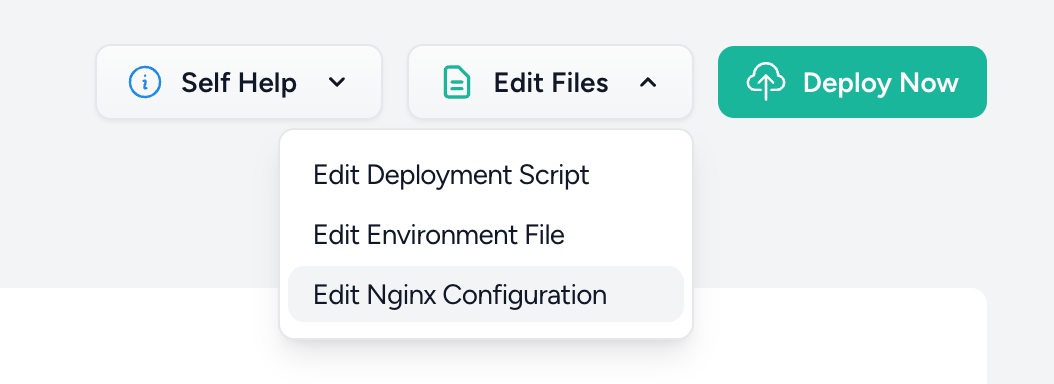
In your site settings, click on 'Edit Files' and 'Edit Nginx configuration'. This will open the Nginx configuration file.
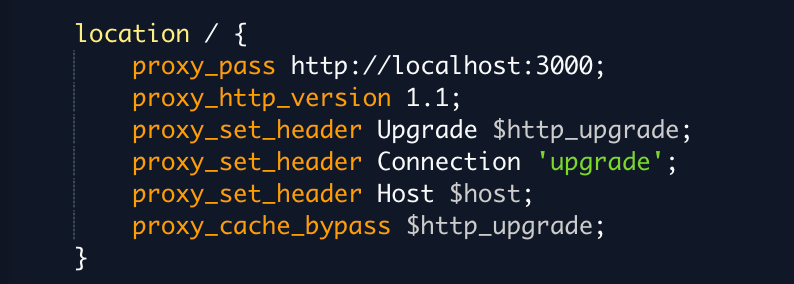
Search for the 'try_files' line:

We'll have to replace this with these lines:
location / {
proxy_pass http://localhost:3000;
proxy_http_version 1.1;
proxy_set_header Upgrade $http_upgrade;
proxy_set_header Connection 'upgrade';
proxy_set_header Host $host;
proxy_cache_bypass $http_upgrade;
}
So if your Nginx configuration file looks like this, you're good to go!
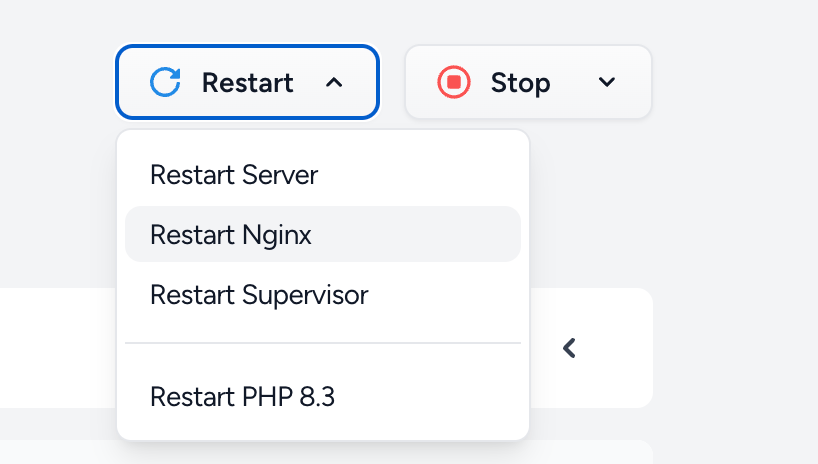
Save the file, and restart your Nginx server just to be safe. Go to your server settings, choose 'Restart' and 'Restart Nginx'
It still doesn't work???
Let's try to visit our site again...
Oh no!
What's happening? Nginx has been configured correctly, but our Node.js app isn't running yet. We'll first have to run npm install and node server.js. You can do this manually by going to the 'commands' section of your site, but let's do it right and configure a daemon.
Configure "node server.js" as a daemon
By configuring the command node server.js as a daemon, Forge will configure a Supervisor that will make sure that the server is always running. Even when the process stops running, the Supervisor will automatically restart the process.
Go to your server in Forge, and go to the daemons section.
For the command, enter:
node <path/to/your/site>/server.js
Make sure that there isn't a space between your path and 'server.js'
The path is /home/forge followed by the name of your site. In my case, it looks like this:
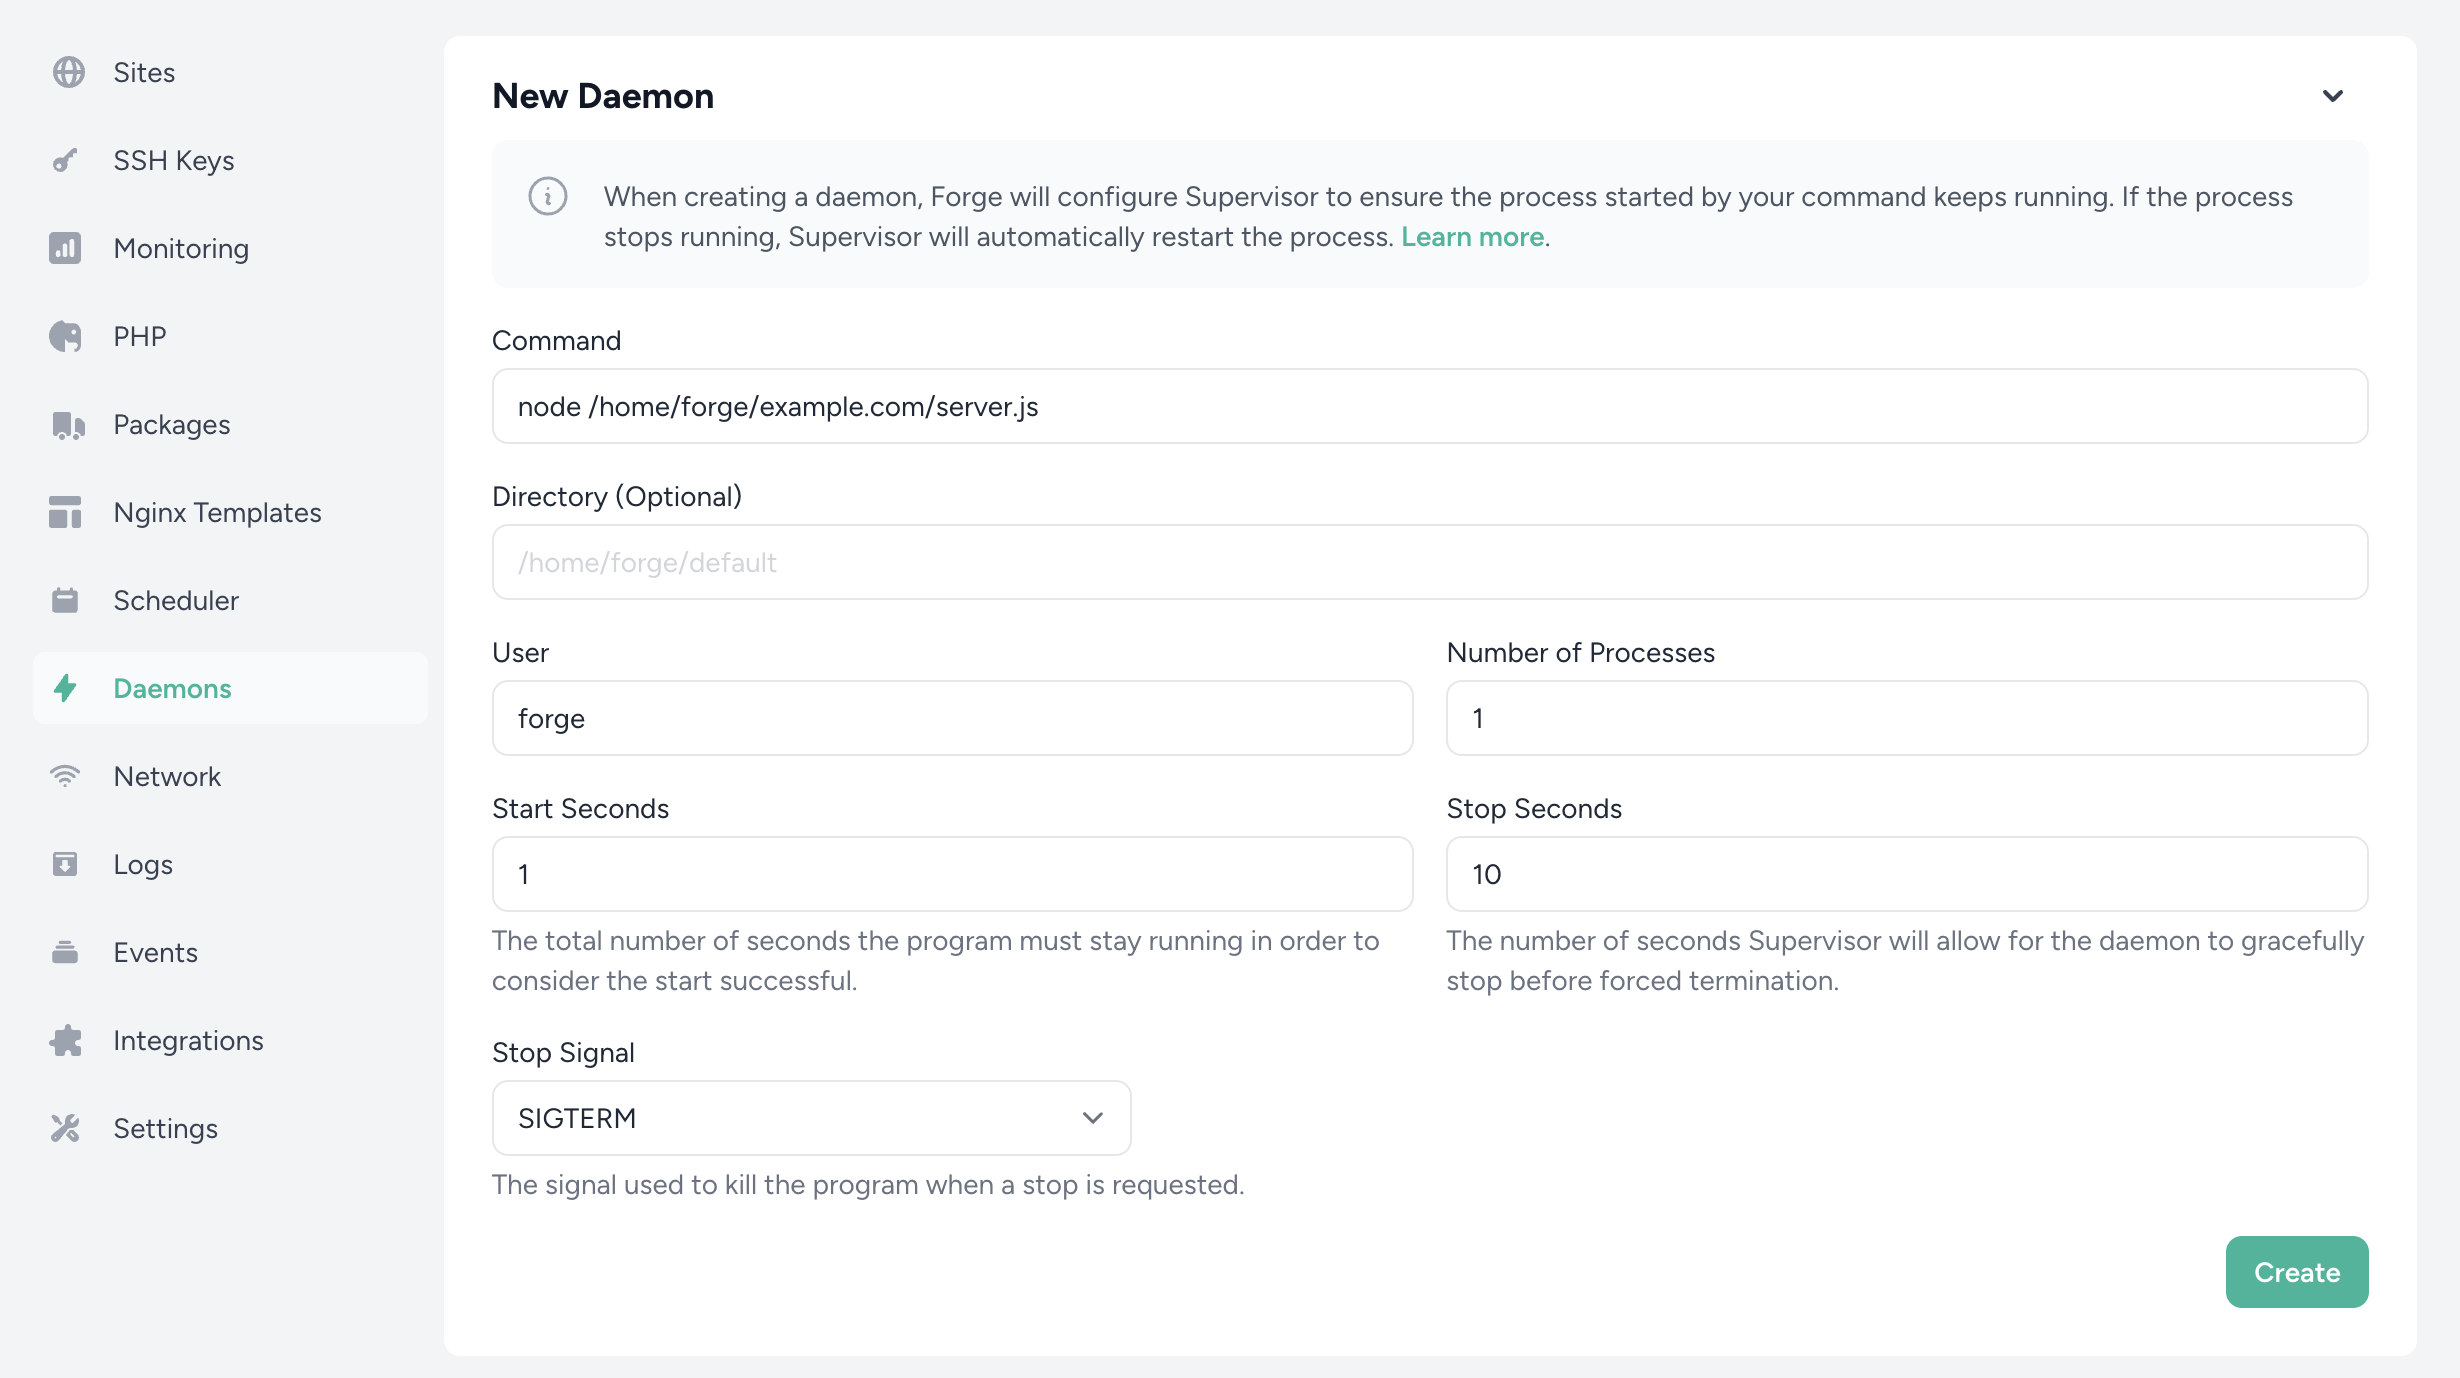
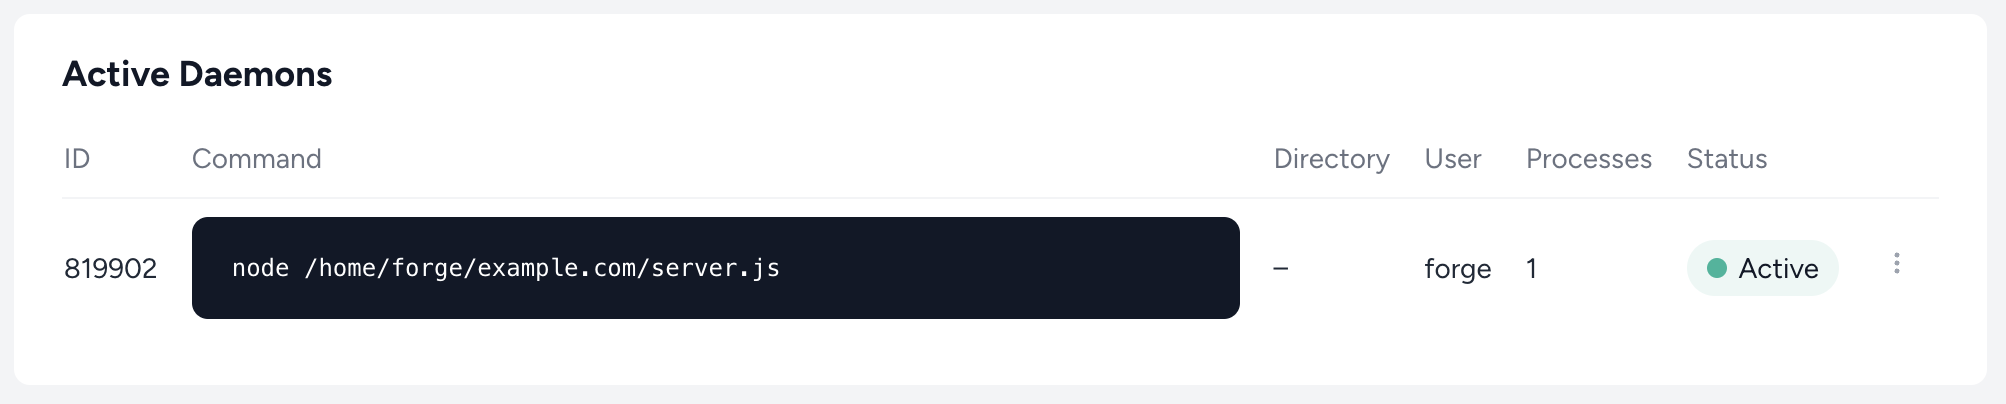
Wait a minute till the status shows 'Active'.
Hmm, still a 502 error when we try to visit the website.
Oh right, we didn't run npm install yet!
Writing a deployment script
We're very close to a working website now.
We only need to write a deployment script that runs the npm install command and we should be golden!
Go to your site in Forge and go to the 'Deployments' section. You can (optionally) enable the Quick Deploy option here. This will make sure that Forge pulls the latest code from source control when you push to the deployment branch.
Let's take a look at the deployment script.
The first two lines can stay (entering the site directory and pulling the latest code from source control), but the rest has to go!
Let's extend the script a bit with an npm install. We should also run the node server.js command, but that will just cause a timeout in our deployment since the process will keep running. The site will work, but it will show a 'failed deployment'.
However, remember that we configured that daemon that makes sure that the node server.js command keeps running even when the process gets killed? Well, let's kill the process! The daemon will take care of the server restart.
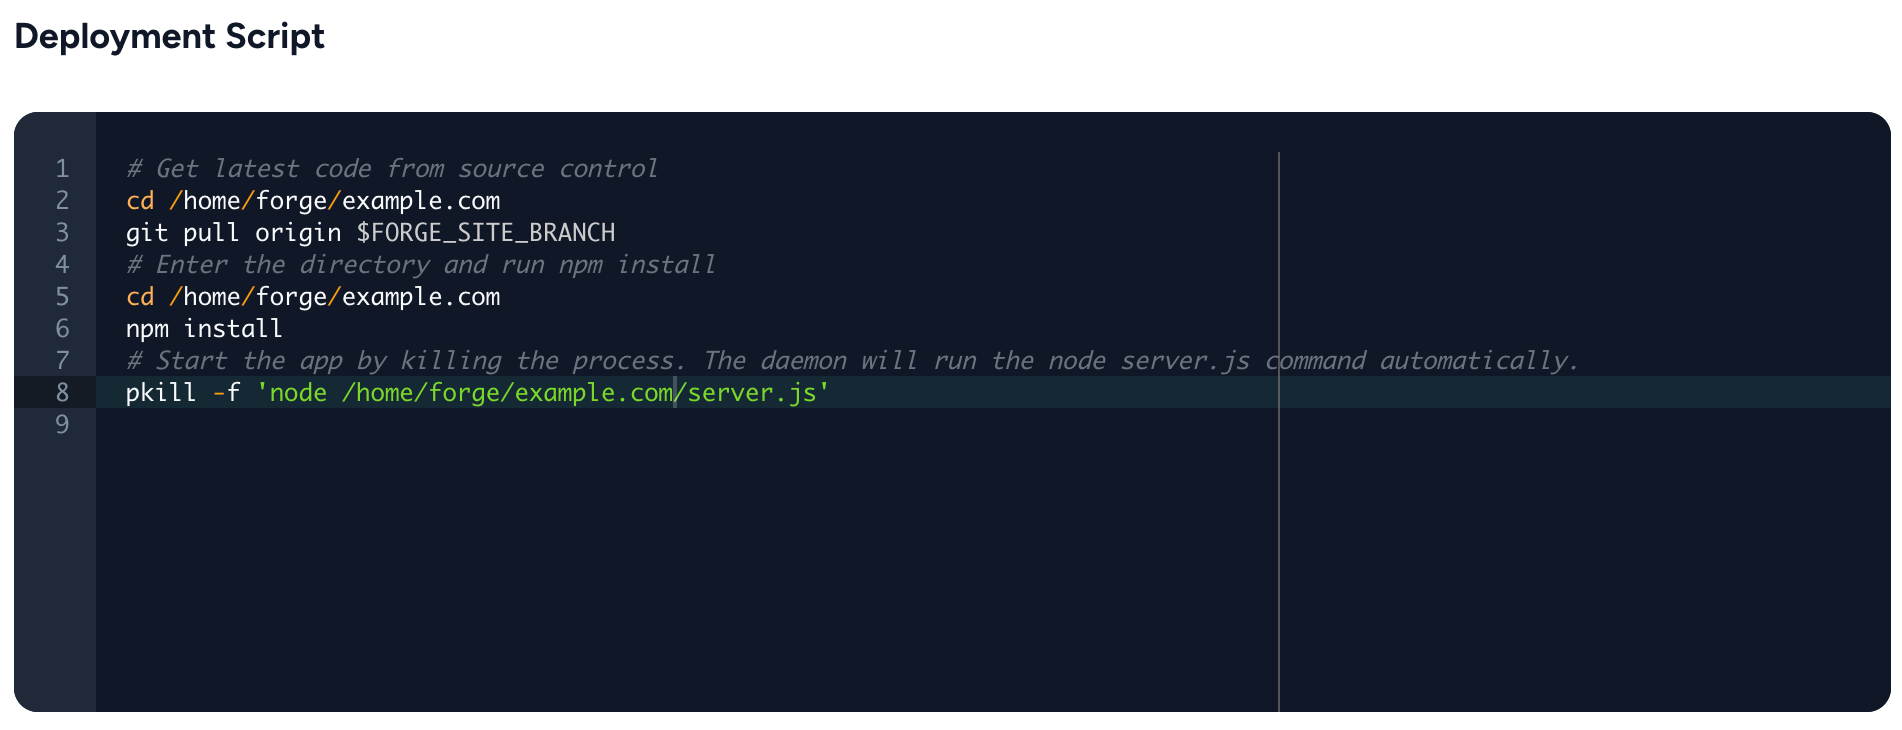
There we go! Let's save the script and click the 'Deploy now' button to get the latest code and run the deployment script.
In the Live Deployment Output screen, you should see that the packages get installed and the deployment status should switch to 'Finished'.

Let's try to visit our site again.
Omg it's finally working
There we go! It took some manual labor, but all in all nothing too difficult. And with the quick deployment, we only have to push changes to our Github repo and Laravel Forge will take care of the deployment.